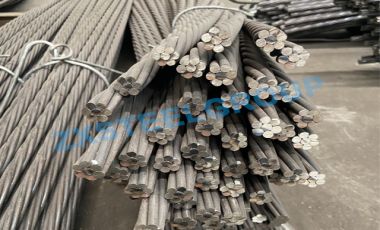
Installing a 17.8mm cable bolt for mine support involves several steps to ensure proper installation and effective reinforcement. Cable bolts are commonly used in underground mining operations to enhance stability and reduce the risk of roof or wall collapses. The following guide outlines the installation process for a 17.8mm cable bolt:
1. Preparing for Installation:
Conduct a thorough geological assessment to determine the appropriate locations for cable bolt installation.
Ensure that the work area is safe and secure, and that all necessary safety precautions are in place.
Gather the required tools and equipment, including a drill rig, a cable bolt installation tool, resin cartridges, mixing equipment, a tensioning device, and personal protective equipment (PPE).
2. Drilling the Hole:
Use a drill rig to bore a hole into the rock or strata where the cable bolt will be installed.
Ensure that the hole is of the correct diameter to accommodate the cable bolt. In this case, a 17.8mm diameter hole is needed.
Drill to the desired depth, which is typically determined by engineering requirements and the specific conditions of the mine.
3. Cleaning the Hole:
Remove all drilling debris and loose material from the hole using compressed air or other appropriate methods.
Ensure that the hole is clean and free from obstructions to allow for optimal bonding and load transfer between the cable bolt and the surrounding rock.
4. Installing the Cable Bolt:
Insert a resin cartridge into the hole, ensuring that it is placed at the appropriate depth.
Use the cable bolt installation tool to insert the cable bolt into the hole, following the manufacturer's instructions.
Make sure the cable bolt is fully embedded in the resin, ensuring a secure bond between the bolt and the surrounding rock.
Repeat this process for each cable bolt installation point, spacing them according to engineering specifications.
5. Mixing and Injecting Resin:
Prepare the resin by following the manufacturer's instructions, which typically involve mixing a resin component with a hardener.
Use a resin cartridge or a resin pump to inject the mixed resin into the hole, filling the annulus around the cable bolt.
Continue injecting the resin until the hole is completely filled, ensuring that there are no voids or air pockets.
Allow the resin to cure according to the manufacturer's specifications before applying tension to the cable bolt.
6. Applying Tension:
Once the resin has cured, use a tensioning device to apply the desired load to the cable bolt.
Follow the manufacturer's guidelines for the appropriate tensioning procedure and load requirements.
Ensure that the tension is applied evenly along the cable bolt to maximize its effectiveness.
7. Monitoring and Maintenance:
Regularly inspect the installed cable bolts to detect any signs of damage, corrosion, or degradation.
Conduct periodic load monitoring to ensure that the cable bolts are maintaining their required tension.
Perform any necessary maintenance or repairs promptly to ensure the ongoing stability of the mine.
It is essential to note that this guide provides a general overview of the cable bolt installation process. It is crucial to consult the specific guidelines provided by the cable bolt manufacturer and adhere to the engineering requirements and safety regulations applicable to your mining operation.
Address: No. 1738, 17th Floor, No. 1 Mall, Shangdu Road, Zhengdong New District, Zhengzhou City, Henan Province, China
Email: zxminesupport@zxsteelgroup.com
Tel: +86-199 3712 3680
© 2020 ZXSTEELGROUP